Tag Archive for: Design Shack

Logo design is one of the most deceptively difficult jobs in all of design. It sounds so easy, pick a font, type out the company name, and maybe underline or circle it. There are designers out there who really do think that way. But, if you actually care about delivering a quality product, its much more complicated.

There are endless brands and logos out there today, and the vast majority fall away into the noise. To create a truly successful logo in the modern day, you have to design something simple but brilliant enough to make people instantly take note. In the best logos, the viewers don’t even realize why they are so attracted to the logo.

But, how do you actually create a logo that accomplishes this? It takes some studied knowledge of design and a bit of ingenuity. Joshua Johnson from Design Shack has a few ways you can approach logo design to create something truly remarkable.

1) The Visual Double Entendre

Many of my favorite logos can be interpreted in at least two ways. The visual entendre is exactly this tactic, which wraps two images into the same visual object. There are quite a few examples of this design strategy out there, but the example Johnson uses is too perfect to ignore, the WinePlace logo.WinePlace Logo
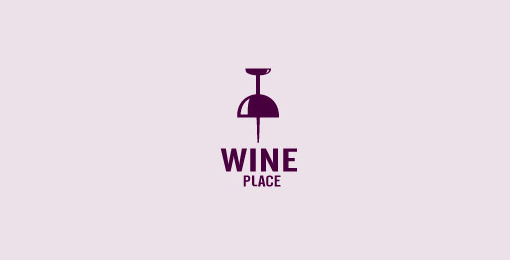
The logo is shaped like a thumbtack, seemingly marking a place or location, but if you look for more than a split second you will easily see the object also looks like an upside down wine glass. This sort of visual “trickery” encourages viewers to look a little longer and absorb the image (and brand name) more than the average glance. It is memorable for its creativity, but also because you force people to pay attention for longer.

Another added benefit of the strategy is that by nature your design must be simple to play two objects into the same image. As you’ll see, simplicity is a great rule of logo design.

2) Pay Attention to Color

One of the most basic facts of design is that color is not simply an aesthetic decision. Every color and tint carries a specific set of meanings and ideas, which often seem so embedded in our brains that our reactions are subconscious.

Many brands will have already noted this and might very well require you to stick to a very specific brand palette, but thats not always the case. On the chance that you have freedom to choose the colors of the design, you will want to pay close attention to picking the colors that will not only look good together, but also represent the nature of the brand.

On top of this, you should make sure the logo will also look clear and distinguishable if it must be printed in grayscale. Not every memo and press release will be full color, and you don’t want to lose the impact or recognizability of the logo just because someone xeroxed a company report.

3) Avoid Cliches

Trends are something that are unavoidable, but you might think twice before playing into what is hot at the moment with your logo design. Sure a popular styled logo might gain you some favor in the moment, but your logo is intended to represent your brand for years to come. You want it to be memorable enough that your logo outlives the current trends.

Fake Hipster Logo - Source: Design Shack

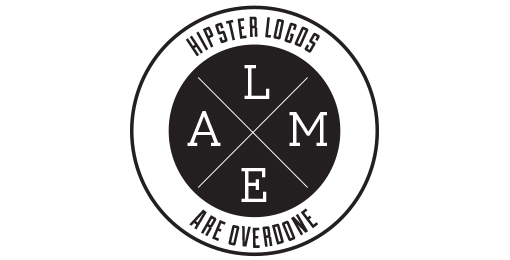
The current example is the dramatic overuse of the circular logo, generally styled vaguely like an old college patch or badge. Circles are popular in design and these types of logos are slightly retro, but just modern enough to have become a terribly common site across the web. But, it also means they are all interchangeable. I don’t remember any brand using the style because they all look the same eventually.

4) Custom Type Never Goes Out Of Style

Coca-Cola Logo

Some of the most popular logos throughout time rely on very little to be successful. Just think of Coca-Cola’s logo. All they need is their signature red color and a custom typeface so notable it has become the source of countless rip-offs and parodies.

The best part of using custom type is that it isn’t immediately able to be copied. Designers looking for a quick and easy way to jump on a potentially successful bandwagon are quick to begin using a font. But, if you have your type hand-designed, it takes a lot more effort to mimic. The irregularities that make custom type so special also make it too unique for a simple conversion to a font.

5) Keep It Simple

Apple-Nike Logos

While custom fonts are certainly a simple but effective way to make your mark, some designers don’t specialize in illustration or typography. That doesn’t mean they are out of luck. Many of the most famous logos in the modern day don’t feature any type whatsoever.

These logos take design to an even simpler stage, where all you need are simple shapes that are as iconic as they are refined. Apple began with their trademark bit apple shape, but originally it was striped with color. Gradually, they began to shift the logo to what looked like a brushed metal apple, but these days you won’t find any of those flourishes. All they need to be memorable is the silhouette of the apple, with that special bite taken out.

Conclusion

There are of course many other approaches you can take to making a memorable logo. For example, Johnson also brings up a discussion of symmetry and proportion in logo design that is better fit for a more in-depth analysis. Simply put, great logos don’t leave things to chance. But the truth is, if you want a truly memorable logo, you might start by trying to create something unlike those before.

Design Kit Screenshot

In general, web designers seem to like tools and resources that speed up their work and ease some headaches. This is most notable by the sheer number of them available. Nearly every design blog or website offers some unique design kit or has a recent blog post sharing the best recent kits.

You might be asking what a design kit is, but these kits aren’t uniform. They come in all shapes and sizes, varying wildly in scope and cost. They also range in quality from ‘incredibly useful’ to ‘waste of harddrive space.’ The best definition for a design kit is any prepackaged tool or piece of software which aids in the creation of a digital design project.

Some design kits come with interface packs, buttons, and graphics all intended to be used together. They may come with a specific color and font palette, but they are almost always customizable. Some kits are niche designs aimed at solving a specific problem, while others are catch-all assortment or full design templates.

The thing is, while these design kits can definitely help a designer in a time-crunch, they have their fair share of drawbacks, as Carrie Cousins discussed in her recent article for Design Shack.

  • Costs – One of the biggest issues with these kits is they don’t always come cheap. There are some great free kits available, but you should expect to pay for kits filled with premium features. For some budgets, this alone can rule out using a specific design kit. Thankfully most kits are relatively cheap for single license use.
  • Too Similar – Some kits begin to look bland because all of the parts are designed to be used together, but without a full finished design in mind. This can result in kits with 50 nearly identical buttons in an assortment of colors. It is up to the designer to choose parts that will look interesting together, but it can be tiring trying to sort out a repetitive and boring kit.
  • Incomplete Kit – Be careful to read all of the details for any kit before you buy so you know what you’re getting. A 1,000 piece kit may seem really useful and interesting until you discover it is largely made or elements you can’t really use. Many kits are themed and only contain certain types of icons such as social media buttons or calendar icons. Don’t spend money on something that doesn’t offer what you need.
  • Looks Too Much Like Another Site – Obviously the biggest problem with using pre-made tools and elements is eventually you’re site will look astonishingly like someone else’s who also used the tool. Many designers aspire to work solely from scratch specifically to avoid this problem, but you don’t have to completely swear off design kits to be original. Use the kit as a starting point. If you use all the elements and layouts as they came, you’re much more likely to look like any other site. If you spend the time to give these elements your own personal touch, you’ll look equally unique.

Large Format PrinterChances are no matter what medium you work in, you consider yourself a designer. Not a web designer, or a print designer, but simply a designer. It is increasingly rare to find a designer that restricts themselves to a specific medium. Why should they when they have almost limitless possibilities for matching their design to the best medium?

The biggest distinction that still lies between digital and print design is the language. Every medium has its own technical jargon, and as a designer it is important for you to understand and be able to speak the language. Even if you think you don’t, Carrie Cousins points out there is a good probability that at some point a client will ask for print components to go with the website. Eventually a client will want to be able to put part of the design onto posters, or business cards, or pamphlets.

You don’t want to be caught off guard and look amateurish in that scenario, and getting informed isn’t difficult. All you need to do is add some new words to your vocabulary. Design Shack put together a list of the ten most important terms. I’ve explained some of them below, but there are always more terms you could learn to be a more rounded designer.

1) DPI

Dots per inch is a literal measure of printing quality. Many traditional printing methods still being used today work by creating tiny dots to create an image. The more dots used per square inch, the higher quality and accuracy of the detail. Most print jobs use 300 or 600 DPI, but lighter papers require lower DPI to prevent color bleed and over saturation.

Many programs include settings to increase or decrease DPI, but the settings only refer to print design. Increasing the DPI will increase a file size, but it means absolutely nothing to digital projects because screen resolution is measured using pixels, not DPI. DPI can improve the quality of printing, but it doesn’t intrinsically affect the quality or size of an image.

2) CMYK

Digital designers are familiar with the RGB color profile, but printing uses a CMYK color model. The CMYK model refers ro a four-color (or plate) process of printing where each letter refers to a color used in the process: Cyan, Magenta, Yellow, and Black (K equals black).

This means any design you create on a computer for a print design needs to be created with CMYK profiles so that the color is accurately reproduced. Many printers will even require that a job be converted before being submitted. Above all it creates consistency across all print jobs.

3) Large Format

Large format refers to any project that needs to be printed on a specialty printer, usually larger than 16 by 20 inches. Usually these types of print jobs are for banners, posters, and sometimes billboards. These types of projects are also made to be viewed from afar, and are usually rather low quality or pixelated up close. From a distance however, they look great. It does require a high quality image to print these projects, but they also tend to be printed at lower DPI.

4) Pantone Color

Pantone is the worldwide standard for color. The company has been around since 1963, and they have established a universal system for understanding and matching colors created by mixing a set of standard colors in precise combinations. This way, they can be precisely printed across different presses and substrates.

The colors are identified by number, but what sets the system apart is the detail they take into consideration. They include information on how to account for different types of paper based on a lettering system.

5) Overprint

Overprint is exactly what it sounds like; it is the process of printing on top of other things. Specifically overprint is when inks are printed directly on top of each other. The effect ca be used to create special effects, but it can also create issues during the printing process if not taken account for. The most common issue is the use of pure black, which can become richer when overprinted, and tends to overwhelm images. Instead, it is suggested to use rich black created with all four color plates to prevent overprinting.

Color Wheel


Have you ever seen the old “optical illusion” that makes one color appear to be two entirely different colors? If you’ll excuse the MS Paint quality image (is there a rule that all optical illusions have to have been designed before 1997?) the one below makes two spirals appear to be blue and green, when the stripes making the spirals are actually the same color. Its the same principle at play as when you look at a color in a design and it just doesn’t seem to work right. When placed next to specific hues, certain colors can take on the visual characteristics of their neighboring color. Making this even more tricky, the human eye perceives color in different ways depending on if it is in the background or foreground.

Optical Illusion


The specific colors that can take on other characteristics are referred to as recessive colors, while those who always look the same are called dominant colors. Many pure colors such as cyan maintain their hue even when mixed or paired with other colors. No matter what color is mixed with a dominant color, the original color will still remain at least partially visible.

Dominant colors also tend to “push through” the design, or powerfully assert themselves within the composition. While recessive colors easily fade into the background, it is hard to make a dominant color sit far in the background. Pure hues are naturally dominant, though primary colors are more dominant than the others, because red, blue, and yellow literally can’t be created by mixing other colors.

Recessive colors, on the other hand, naturally fade into the background. They also easily take on the properties of any surrounding color. Recessive colors act as a neutral in a palette which help the more dominant colors maintain their emphasis and focal attention. As Carrie Cousins puts it, “recessive colors are the blurry or muted tones behind the focal point of an image or the pattern that appears behind something you’re supposed to be looking at.”

Cousins explored the relationships between dominant and recessive colors exhaustively at Design Shack. Not only does she delve into the scientific basis for why we perceive these colors the way we do, she also explains how these ideas can be adapted to design of all kinds, including web design.

More than a few web designers try to ignore it, but SEO is an incredibly important part of your website. Simply put, search engine optimization is the reason many people land on your site, and it can help you control who those people are to an extent. SEO should be an ever-present concern through your design process.

If you’ve managed to completely remain uninformed on SEO, it is the process of making your page as accessible and valuable to search engines as possible. It isn’t buying ads, which can attract traffic as well, but instead structuring your site in a way that reflects the preferred methods of the most popular search engines, so that they will see your website as being valuable enough to place higher up in their rankings.

If you read up on SEO much at all, it becomes clear that SEO is also constantly changing and updating, but there are basics that any website owner can do to make their page attractive to search engines and all optimization is boosted when you consider it from the beginning of your design. If you take a few steps when you first get started, you will find that every page you design performs better and more people actually lay eyes on your hard work.

Content and Text

Once you know the topic, theme, or goals for your current project, designers should brainstorm a few keywords that best describe the content that site will be used for. If you are doing a site for design, the obvious choices are “design”, “web design”, “typography”, “css” and maybe even “tutorial”.

Once you’ve chosen the proper phrases and keywords, be aware of using them throughout the site in ways that feel natural. You can fit keyword into headers, headlines, links, and meta data on every page of the site, but you should be careful about over-populating the page with these words to the point where it appears unnatural. Search engines will punish those who are obvious about “keyword stuffing”, so just don’t overdo it.

Images

First off, what search engines see and what users are shown are very different, especially concerning images. Search engines only see text, not images, so it is important they are aware of what your images show. That’s why it is smart to use alt tags on every image of your site that gives a description of what viewers are actually seeing.

For designers, another option for visual elements of the page such as banners and selected graphics is to design them using webfonts, HTML, and CSS when possible. Search engines can read those banners as regular text when created through this, which means you don’t have to worry about the markup.

Another aspect of image SEO is preparing the image properly before uploading them to your site. Huge pictures will slow down page loading time, which causes many potential viewers to leave before they even see the finished page.

Site Map

Site maps are xml files that outline the entire structure of your website, and they are like cheat-sheets to your site’s navigation. Create one, and make it live on every website you work on. Make sure it is submitted to Google so that the crawlers can use it even easier. Users also like access to sitemaps as well, though they’ll be less interested in it if your navigation is done properly.

Conclusion

There is even more a designer can do to optimize their site from the start of their workflow. However, be careful before diving too far into the SEO pool, because there are many “tips” and “tricks” offered out there that are either out of date or outright improper in Google’s eyes. SEO isn’t immediate, and any site telling you they can teach you how to get your site to the top of the results quickly is probably selling snake oil.

Design Shack offered some other credible suggestions for optimizing your site from the design stage, as well as tools that can get you started.

There are so many articles out there fawning over the design of Apple’s products. Starting with the third or fourth version of the iPod, every new product has gotten nothing but love for their revolutionary design, all the way up to the iPad. Every part of the iPad’s design, including the interface, have been broken down and critiqued.

There is one aspect of the iPad that Apple can’t control, however. Apple designs a few apps, but the vast majority are made by other companies. Sure, a good amount of them are cheaply designed, but there are also high quality apps made by designers that care, and it is in those apps that you can learn some of the best rules for modern design. Carrie Cousins collected ten things she learned from iPad apps at Design Shack, and they can be transferred over to any other medium today.

It all begins with an emphasis on simplicity, and Cousins pinpoints one of the most undeniable reasons why web design has taken a turn towards minimalism. Too much on a small screen can overwhelm the user, and simple, easy to use designs help the on-the-go user access what they want, when they want it.

Almost every major trend in web design is also observable through iPad apps. Simple color schemes, and flat designs are all the rage right now, reflecting the continued push towards simplicity on these small screens and it is hard to deny how effective the design changes are. Apple has never been a proponent of flat design, but recent redesigns by CNN and Facebook show that flat design looks great on tablet screens.

CNN App

The unforgiving Retina Display of the iPad will also teach any lazy web designer a good lesson very quickly. You can’t cut corners on any visual aspect of an app. One low quality icon will stick out like a sore thumb on an otherwise crisp and clear interface, and one small shoddy image will destroy the value of your content just like a crack in the foundation of a house will one day destroy that home.

There are plenty more lessons to learn from iPad apps. Cousins has a few more in her article, but if you are critical of iPad apps as you use them, you’ll learn even more. The best part is, because apps are constantly updating their designs, and new innovative apps are coming out every day, you will be able to keep up to date with design so long as you keep killing time on your tablet.